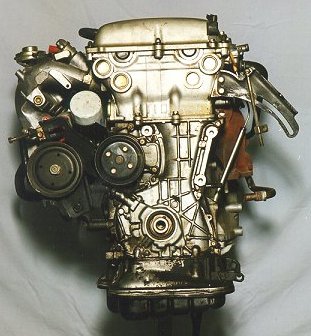

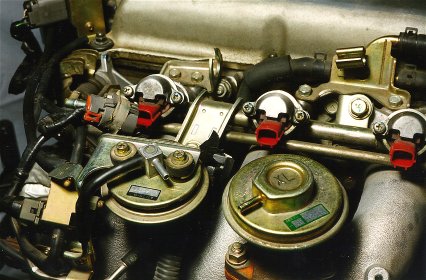
Since we rarely get the chance to see all areas
of the engine clearly because it's installed in the car, we figured we
should take the opportunity to document all areas of the engine.
We took a whole roll of photos before we even touched so much as a wrench
or a screwdriver. So now we're done and can start tearing it down
right? Well, we decided that we needed to take more photos.
The engine came with the wiring harness still attached since Mike installed
the SDS computer in place of the Nissan ECU when he installed his DET.
So, before we started on the second set of photos, we removed all electrical
wiring. We then took another full set of photos with details of where
all those little hoses and other things connect.


Well, if you're smart, you go out and buy boxes of different sizes of zip-lock type sandwich bags, some 3x5 cards and an indelible marker. You've got to take an awful lot of stuff off the engine. A year later, you won't remember where all those little nuts and bolts go. This is one time you don't want to be more efficient than the factory (assembling something and ending up with parts left over). And, if you think you won't be reassembling the engine a year later, neither did we. As it turns out, that's probably about when the engine will go in the car. It might go in sooner, but hey, ten months, twelve months, it doesn't matter. You still won't remember where all those itty bitty parts go. So, each part we took off the engine went into an appropriate size "baggie" with a note card. The injectors are sitting in a bag in the top of our toolbox waiting to be sent out for cleaning. The same goes for the throttle body.
We have since been told of an additional routine we will use in the future when tearing down an engine or gearbox. Get yourself a spiral notebook. Use this as your log. Every time you remove something, write down in detail what you removed, disconnected, etc. Write down what order you removed bolts, hoses, and other connections. This will help the reassembly process. While it sounds laborious, wait until you have to reassemble the engine or gearbox. You will be glad you did it.
We should mention here that failure to have a
FSM in your possession at this point is crazy. Although you might
think you can remove nuts and bolts in any order, the FSM recommends otherwise.
This is not to say that everything must come off in a prescribed order.
That's not the case. There are, however, critical components that
should have the torque on the nuts and bolts relieved in a particular order. 
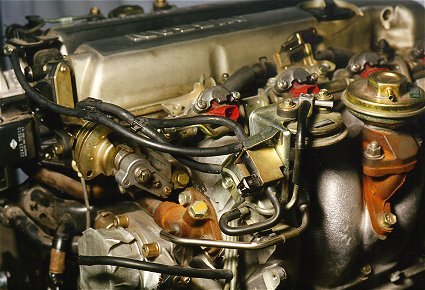
As we stripped the engine of all its external components, we took still more photos. As each hidden part, nut, or bolt was revealed, we took another photo. Hell, you could probably reassemble the external components of this engine just from all of the photos we've taken.
All of the external pieces of the engine came off with no troubles what so ever. We discarded all of the old hoses and clamps. There is no sense skimping here when replacing everything else. This is as good a place as any to warn against skimping and cutting corners in too many places. If you are going to go through this process yourself, don't shoot yourself in the foot by reusing parts that should be discarded or by hurrying. You are already spending a great deal of money to have a hand-built high performance engine. Don't be penny wise and pound foolish. Likewise, this is not a project for those whose only engine needs to be rebuilt in their only car. Instead of rushing this project, you are well advised to take twice as long as you think it will take (or actually three times as long since it will already take twice as long as you think).
As we said, all of the external pieces came off this engine without a hitch. Be careful taking off the power steering pump and its brackets. The brackets also support the intake manifold. Although the intake manifold is aluminum, it is still a fairly heavy piece.
It was impossible to remove the injectors while the fuel rail was still attached to the intake manifold. The easy method is to remove the entire fuel rail and push the injectors out rather than try to pull them out. This is not described in the FSM. This is what we did. If you do this, you are making a conscious decision to do so. We accept the responsibility for any consequences on our engine. We don't on yours. We are just telling you what worked for us.
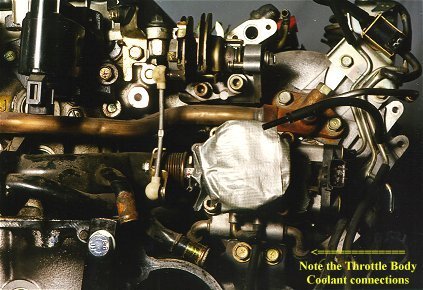
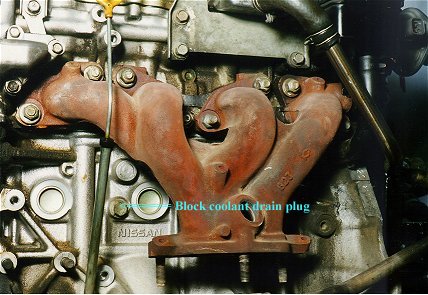
As we said before, have your FSM handy and read it. It is important to note that the FSM recommends leaving the intake and exhaust manifolds on until the head has been removed. There is a lot of speculation as to why this is. The best guess is that it helps with leverage when removing the head while the engine is in the car. Whether this is true or not, we recommend not taking the manifolds off just yet.
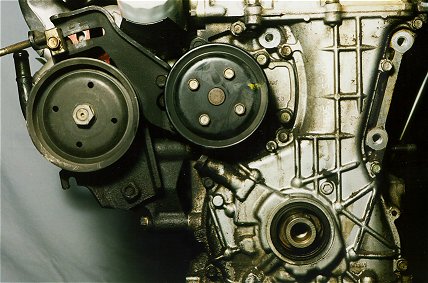
Before you do anything with the cam sprockets
or the chain, be sure you remove the chain tensioner and the front cover
of the engine. The cam sprockets are held on by two 25mm bolts.
We didn't have a 25mm wrench lying around in our toolbox (do you?), so
we had to go to Sears. The Sears Hardware near us didn't have a 25mm
wrench, of course. They recommended we use a 1" wrench. We
had our doubts, but after being assured if it did not work we could return
it, we went back home and found it fit perfectly. We had to
use it on the flats of the cams since our adjustable wrench was too wide
to fit. When it came time to remove the bolts, we used our electric
impact wrench. It worked like a charm. We held the wrench attached
to the cams just in case. We didn't want the cams moving while we
removed the bolts. We guess we should mention here that the timing
chain and the sprockets appear in very good shape after 118,000 miles.
This engine had Mobil 1 oil changes every 3,000 miles. This condition
of the chain and sprockets made us feel better about the timing chain on
the engine that is in the car now (currently with 141,000 miles).
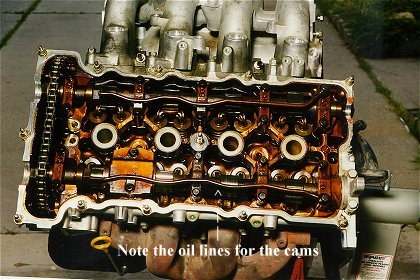
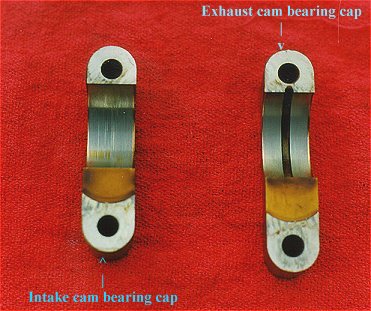
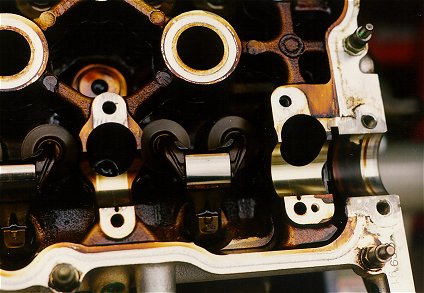
We also did not loosen the cam bearing caps all in one step. You
want to relieve the force on the cams in equal amounts. You really
don't want to break a cam. After removing the cams, remember to remove
the rockers, shims, and rocker arm guides. You don't want to lose
track of those buggers when you remove the head. Take the voice of
experience. When we removed the head they went everywhere.
Fortunately for us, we found them all easily. We had fears, however,
of them being lost under the valve springs or worse.

The cylinder head bolts must be loosened in the proper sequence. The FSM says to loosen the head bolts in three to four steps. Take this seriously. In addition to potentially causing damage to the head, those suckers are on there tight. We needed to use a breaker bar (OK, it was an 18", 3/8") with a piece of 2' black pipe as an extension. And we had to really exert some serious force. During the first step in loosening the head bolts, we couldn't even feel them move, but we could hear them break loose. It is a weird feeling, and you should exercise caution when you do this. This is not a time to get ham-handed. Also try to turn each of the bolts the same amount each step of the way. It took us five steps before we could loosen the bolts by hand using the socket and extension.
Things like the exhaust and intake manifolds must have their bolts loosened in the proper sequence. We recommend you follow this procedure. We waited until we loosened the cylinder head bolts to remove the manifolds. We did, however leave the head on the block while we removed them.
With the head off, we set it aside to be crated and shipped to Dan Paramore Racing (DPR) for Stage VI head work. We'll go into that more in a later article. Try to get all of the remaining pieces of gasket material off the cylinder head before sending it to whoever will be working on your cylinder head. When we were touring DPR, we saw an almost finished head that still had some gasketing material attached. We recommend you clean up all of the grease and gasketing on the outside of the head before you send it. Yes we know, they are going to dip the head in a cleaning tank, but we learned in our kart racing days to always clean your parts. It's a good habit to get into and it's the only way of spotting possible problems with your parts. Leaving gasketing material on the head when you send it out is just sloppy.
At this point we have an SR20DE engine with just
"a little off the top."


Check back soon for the next installment.
Copyright George D. Roffe 1998